How to program on Arduino
Introduction:
Whether one is a student or a professional in electronics, Arduino programming presents a plethora of chances. Arduino’s user-friendly structures makes it simple to put together interactive projects even if you have no prior knowledge of programming. In this tutorial, we cover the fundamentals of Arduino computing, covering how to configure your board and submit your first application. Come learn about the interesting realm of Arduino programming with us!
Section 1: Setting Configuring the Arduino Board and IDE:
Turning on your board and installing the Arduino IDE on your PC are preparations for begin to work with Arduino. You will now be assisted with the beginning of the routine.
1.1 Attaching the Board to the Arduino:
Link the Arduino Board and Computer Ensemble: If you want to connect your Arduino board to your computer, use a USB cord. Verify that your computer has appropriately identified and connected the board.
Installing Drivers (If Necessary):
To allow for your Arduino board to talk with your computer, you may be forced to install drivers. For driver installation instructions unique to your board and operating system, read the manufacturer’s website.
1.2 Setting up the Arduino IDE:
Get the Arduino IDE here. Get the Arduino IDE for Windows, macOS, or Linux by going to the official Arduino website.
Set up the Arduino IDE:
To install the Arduino IDE on your computer, adhere to the installation guidelines given on the Arduino website. Running the installer application and choosing the installation directory are the only step in the typically simple installation process.
1.3 Choosing the Board and Port for Your Arduino
Choosing an Arduino Board:
Launch the Arduino IDE programs on your PC.
Navigate to the Tools menu, then choose Board.
Select the model of your Arduino board from the list. If you are certain about the board you have, looking up the model name on the board or in the instruction booklet.
Choosing the Serial Port:
Select Port on the Tools menu next after identifying the board.
Select the serial port that links to your Arduino board. Your operating system may have unique port names.
1.4 Checking the Configuration:
Testing the Connection: You can upload a basic program to make an LED blink in order to make sure that your Arduino board is configured and linked to your computer correctly.
Uploading the Program:
Utilizing the Arduino IDE, simply copy and paste the code above into a new sketch.
To compile and upload a program to your Arduino board, click the Upload button (the right arrow icon).
The onboard LED on your Arduino board, which is attached to pin 13, should be blinking on and off every one second if everything has been setup properly.
Best wishes! You are now prepared to begin programming your Arduino board and IDE after successfully establishing them. We’ll go into writing your first Arduino program in the next section.
Part 2: Composing Your Initial Arduino Program:
After installing your Arduino board and IDE, you’ll be able to write your first sketch, or your Arduino program. This part will teach you how to code a basic program that will update an LED tied to your Arduino board.
2.1 Introducing a Fresh Sketch:
Get the Arduino IDE open:
Start your computer’s Arduino IDE.
Start a New Sketch:
To start a new sketch, go to the File menu and choose New.
2.2 Composing the LED Blinking Program
Explain Pin Configuration
Define the pin that your LED is attached to first in the new sketch. For instance, you can define your LED as follows if it is attached to pin 13:
cpp
Transfer code to int ledPin = 13;
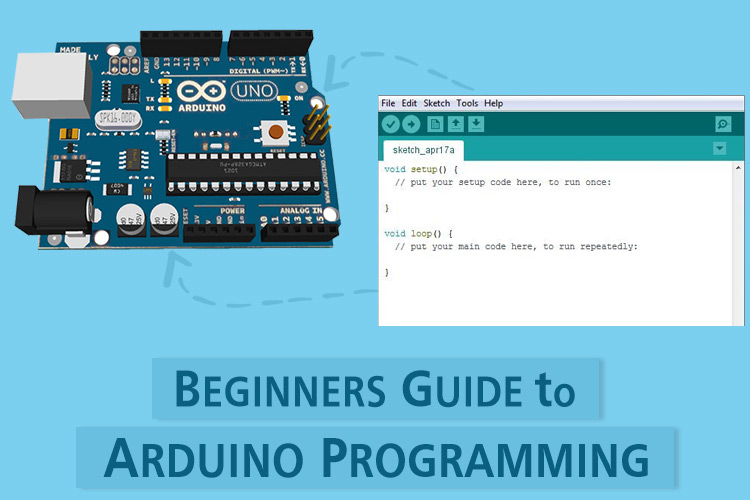
Configuration Task:
When your Arduino board first powers on, the setup function is called once. Use it for any additional setup activities, such as initializing the pin modes. In this instance, the ledPin will be configured as an output pin:
void setup() {
   pinMode(ledPin, OUTPUT);
}
Loop Purpose:
The loop function is called periodically when you power on your Arduino board. The main logic of your program will go here. Use the digitalWrite function to turn the blinking LED on and off at regular intervals.
void loop() {
   digitalWrite(ledPin, HIGH); // Turn the LED on
   delay(1000); // Wait for 1 second
   digitalWrite(ledPin, LOW); // Turn the LED off
   delay(1000); // Wait for 1 second
}
Final Sketch:
This is how your finished Arduino sketch should appear:
int ledPin = 13;
void setup() {
   pinMode(ledPin, OUTPUT);
}

void loop() {
   digitalWrite(ledPin, HIGH);
   delay(1000);
   digitalWrite(ledPin, LOW);
   delay(1000);
}
2.3 Putting Your Program Online
Save Your Sketch:
Select File > Save or click the floppy disk icon to save your sketch before uploading your software.
Put the program online:
Click on the “Upload” icon (the right arrow) in the Arduino IDE to develop and upload your application to the Arduino board.
The upload process’s progress will be shown in the IDE.
Check for Blinking LEDs:
The LED attached to pin 13 on your Arduino board ought to start blinking on and off every one second when the upload is finished.
Best wishes! Your first Arduino application has been written and uploaded successfully. Try varying the delays and patterns to personalize your LED’s behavior.
Section 3: Exploring Arduino Programming Concepts:
After writing your first Arduino program, let’s examine some essential programming ideas that will enable you to design more intricate and captivating projects.
3.1 Types of Data and Variables:
Changeables:
Data that can be altered and used in your application is stored in variables. The following syntax can be used to declare variables in Arduino programming:
dataType variableName = value;
For example, to declare an integer variable named sensorValue:
int sensorValue = 0;
Data Types:
A wide variety of data types are utilized by Arduino, including characters (char), integers (int), numbers that are floating points (float), and Boolean values (bool). Based on the type of data you must keep, select the right information type.
3.2 Regulation Frameworks:
In the event that A block of code can only be executed using the if statement in the event that a particular condition is met. As an illustration, consider this:
int sensorValue = analogRead(A0);
if (sensorValue > 500) {
   // Do something
}
While Loop: The while loop repeats a block of code as long as a specified condition remains true. For example, to blink an LED while a button is pressed:
int buttonPin = 2;
int ledPin = 13;
bool buttonState;

void setup() {
   pinMode(buttonPin, INPUT);
   pinMode(ledPin, OUTPUT);
}

void loop() {
   buttonState = digitalRead(buttonPin);

   while (buttonState == HIGH) {
      digitalWrite(ledPin, HIGH);
      delay(500);
      digitalWrite(ledPin, LOW);
      delay(500);
      buttonState = digitalRead(buttonPin);
   }
}
3.3 Functions
Creating Functions:
You may arrange your code into reusable structural pieces by using functions. The syntax provided below can be employed when creating a function:
returnType functionName(parameters) {
   // Function body
}
For example, a function that adds two numbers:
int add(int a, int b) {
   return a + b;
}
Using Functions: Once you’ve defined a function, you can call it from your main program:
int result = add(5, 3); // result is now 8
3.4 Arduino Libraries
1. Built-in Libraries:
An assortment of built-in libraries that offer extra functionality are included with Arduino. The #include directive can be used to include these libraries in your drawing. To operate a servo motor, for instance, utilize the Servo library as follows:
External Libraries:
To add novel features to the ones you create, you can use a range of third- party libraries that Arduino users have written in addition to the built-in libraries. Apply the Arduino Library Manager to search for and install these libraries.
You will be able utilize Arduino to develop more complex and interesting projects if you comprehend and put these programming concepts into effect. Try out various concepts and tasks to improve your Arduino programming abilities and originality.
Conclusion
To sum up, finding out how to use Arduino delivers a creative and engaging approach to create electronics projects. You may unleash your creativity and create a wide range of projects by acquiring the fundamentals of Uno programming, which include setting up your board, writing your first program, and exploring topics like parameters, control structures, functions, and libraries. Depending on how experienced you’re with development, Arduino offers a simple platform that lets you realize your ideas. Now grab your Arduino board, get to work on some code, and set off on an excursion to learn everything there is to discover about the Arduino coding world!
Follow elgarnaoui.com to get more tutorials about Arduino
Let’s level up our Arduino skills together!  #Arduino #Programming #DeveloperCommunity