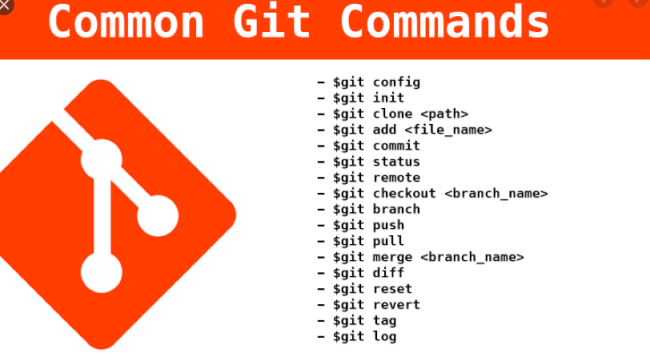
Git Commands Tutorial For Beginners
This tutorial is about to learn some basic git Version control system commands via the command line, with some example.
Requirements:
Introduction: What is Git?
Git is a version control system:
A set of software tools for:
● Memorize and find different versions of a project.
● Facilitate collaborative work.
Originally developed by Linus Torvalds to facilitate the development of the Linux kernel.
● Free/open-source software.
● Available on all platforms.
Tool configuration:
Configure user information for all local repositories
Defines the name you want to associate with all your committed operations
git config --global user.name "[name]"Defines the email you want to associate with all your commit operations
$ git config --global user.email "[email address]"Enable colorization of the command line output
$ git config --global color.ui autoStart a Git repository:
Create a local repository from the specified name
$ git init [project-name]Clone an existing repository:
$ git clone ssh: //elgarnaoui@serveur/git/projet.git
$ git clone https://repositoryurl/projet.git
The “clone” command creates a copy of an existing Git repository. You clone a repository with git clone [URL]. We have both the clone by the ssh URL which requests a public key and by HTTPS which asks for authentication each time.
Exclude from version tracking:
Exclude temporary files and paths
A text file named .gitignore helps prevent accidental version tracking for files and paths that match specified patterns.
* .log
build /
temp- *
List all files excluded from versioning in this project
$ git ls-files --others --ignored --exclude-standardSave changes to a repository:
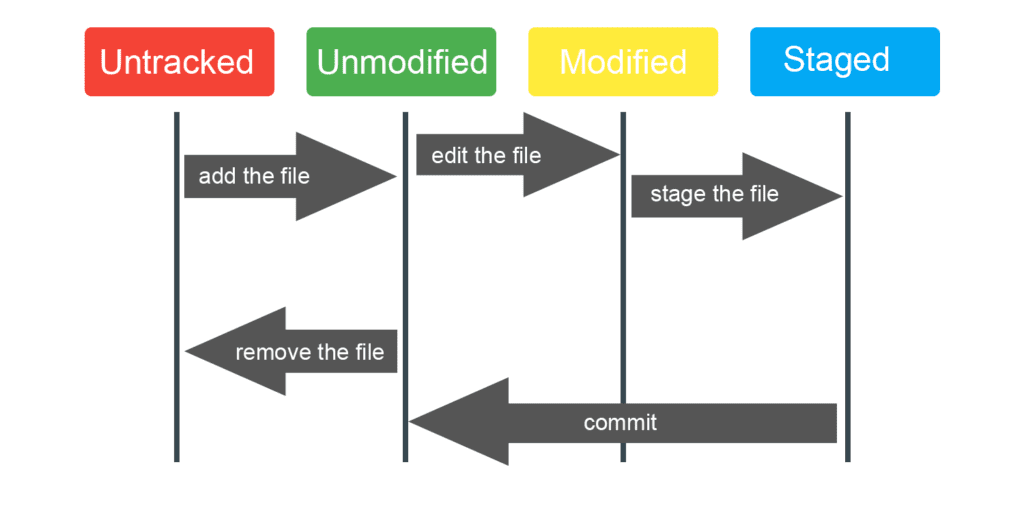
There are four states of a Git file:
- Untracked: file not (owned) or no longer managed by Git;
- Unmodified: file safely saved in its version current in the repository database;
- Modified: a file that has undergone modifications since the last time that it has been submitted;
- Indexed: same for modified, except that it will be taken instantaneously in its current version of the next commit.
a- Check the status of files:
$ git status
On branch master

No commits yet

Untracked files:
  (use "git add <file>..." to include in what will be committed)
        .springBeans
        SpringTuto/
        pom.xml
        src/

nothing added to commit but untracked files present (use "git add" to track)
Untracked files: files not tracked because it is not indexed.
b – Index the addition or changes of a file before submitting (commit) changes:
$ git add .c- Validate the modifications:
$ git commit –m "My first commit"The “commit” command is made to validate those that have been indexed with “git add”. Index pad no validation.
After the –m option is followed by a user comment, describing what it has accomplished and it adds the file to the Git directory/repository (local) but not yet on the repository distant.
d- View the history of validations:
$ git logBy default, git log lists in reverse chronological order the commits made. This means that the most recent ones appear first.
e- Redo commits:
Correct errors and manage the history of corrections.
Rollback all commits after [commit], keeping changes locally
$ git reset [commit]Removes all history and changes made after the specified commit
$ git reset --hard [commit]f- Push your work to a remote repository:
$ git push origin masterThe “push” command is used to send all the “commits” performed in the Git/ repository (HEAD) directory of copy from the local repository to remote repository.
g- Recover and shoot from remote repositories:
$ git pullThe “pull” command allows you to update your repository local of the last validations (modifications of files). It makes the order before indexing changes.
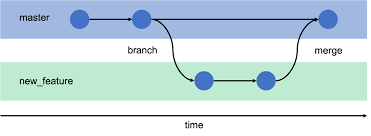
Git Branch:
To make a branch means to deviate from the mainline of development and to continue working without worrying about this main line.
The default branch in Git when you create a repository is called master, and it points to the last of the commits to be performed.
Why use branches?
- Be able to embark on ambitious developments by having always the ability to revert to a stable version that we can continue to maintain independently.
- Being able to test different implementations of the same functionality independently
1- Create a new branch named “feature_x“:
$ git branch feature_x2- Switch to an existing branch:
$ git checkout feature_xThis moves (HEAD) the pointer to the feature_x branch. All commits at this time are done on the current branch.
3- Return to the main branch:
$ git checkout master4- Delete the branch:
$ git branch –d feature_x5- Incorporation of the modifications of a branch in the current branch (HEAD) by merge:
$ git mergeMerge another branch with the active branch (for example Master). It is possible that there are conflicts to be resolved during a merge.
Merger conflicts:
When you change the same part of the same file in the two branches you want to merge, Git does will not be able to perform the merge properly:
- No merge commits are created, and the process is put on pause.
- You must then settle these conflicts manually by editing the files indicated by git:
- Make
git statuswhich gives the files that could not be merged (listed as “unmerged”). - Mark conflicts as resolved by placing the order git add or git commit -a
- After resolving all conflicts, we can submit changes as a merge commit object with
git commit –m "My first commit"orgit pushand terminate the merger process.
- Make
Thank you for reading our post, To support us share it with your friends on social media. And if you have any question, let me know in the comment below 🙂